We understand that although we live and breathe audio visual systems in a wide variety of commercial, government and education based environments – often our customers do not!
We have developed this section of our website in an effort to try and assist you with the many and varied frequently asked questions or topics that we find are most difficult for our customers to understand or grasp.
If you have a suggestion for a topic you think we should address, please do not hesitate to email us at: info@dibaustralia.com.au and make your suggestion.
Best regards,
The DIB Team.
Do you ever walk into a classroom or boardroom to take a lesson or make a presentation and it’s obvious your projector settings have been tampered with?
What can be done to stop these types of people tampering with the technology?
This annoying issue can be fixed by adding in a control Panel for simple, easy-to-use functionality. This does away for the need for remotes, which can get lost, stops changing of menu settings or one of the most frustrating things about remotes; flat batteries.
Many organisations when considering an AV installation opt for one of the following control panels; a JED, Joey or a slightly more aesthetically-pleasing Extron controller with soft buttons. These control panels create a simple interface that any user can operate and prevents the tampering of settings via a remote.

Extron MLC 62 conrol panel
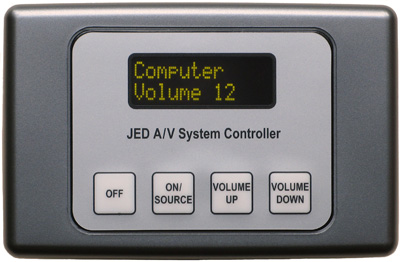
JED T460 Control Panel
If you require assistance from a service technician, call our Service Manager on 9459 0000 or contact us
For assistance with your custom audio visual requirements, contact a DIB Audio Visual Solutions Consultant today Phone (03) 9457-4800 or contact us
Safer Floor Boxes for AV installs
There has been many issues caused by Floor Boxes that are installed as part of an AV system. The main issue is due to the metal lid closing on the metal surround, which effectively working as a guillotine, cuts or severs cables. This not only means replacing cable, but also creating a potential OH&S issue with “live cables”. Other issues are the lid closing on fingers which can cause injury to varying degrees.
The solution is a Protector Series of Floor Boxes from ECD, which have a cleverly designed CableshieldTM Cable Protection Insert. This prevents cables for getting damaged or the box itself becoming “electrified” because of contact with an exposed wire. This is due to the plastic material in the moulding. Also unique is the self-close lid, which stops the lid of the floor box closing rapidly on top of cables or fingers.
For more information on the ECD Floor Box or for assistance with your custom audio visual requirements, contact a DIB Audio Visual Solutions Consultant today Phone (03) 9457-4800 or contact us
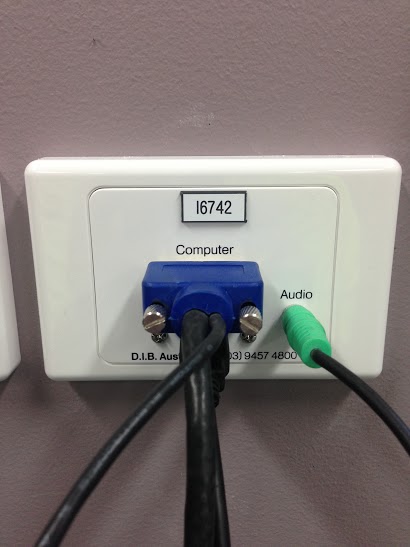
When connecting to an AV system, typically there are two methods.
The first is VGA, which has been commonly used for computer/laptop connections for a long time. This is an analogue-type connection and requires the addition of a 3.5mm audio connection to reproduce the sound from a device. So, the (generally) blue connector gives you the visual, whilst the 3.5mm jack provides the audio.
VGA was the main connection for many years, but now a digital version called HDMI is becoming the standard for connection to projectors and monitors. HDMI is a more reliable, higher resolution (up to 1920×1080) connection. It also includes the Audio component in the cable, so there is no need to connect a second cable (like the 3.5mm cable with VGA).
So, if you have the choice, always go for the HDMI connection for reliability and a higher screen resolution (clearer / sharper images).
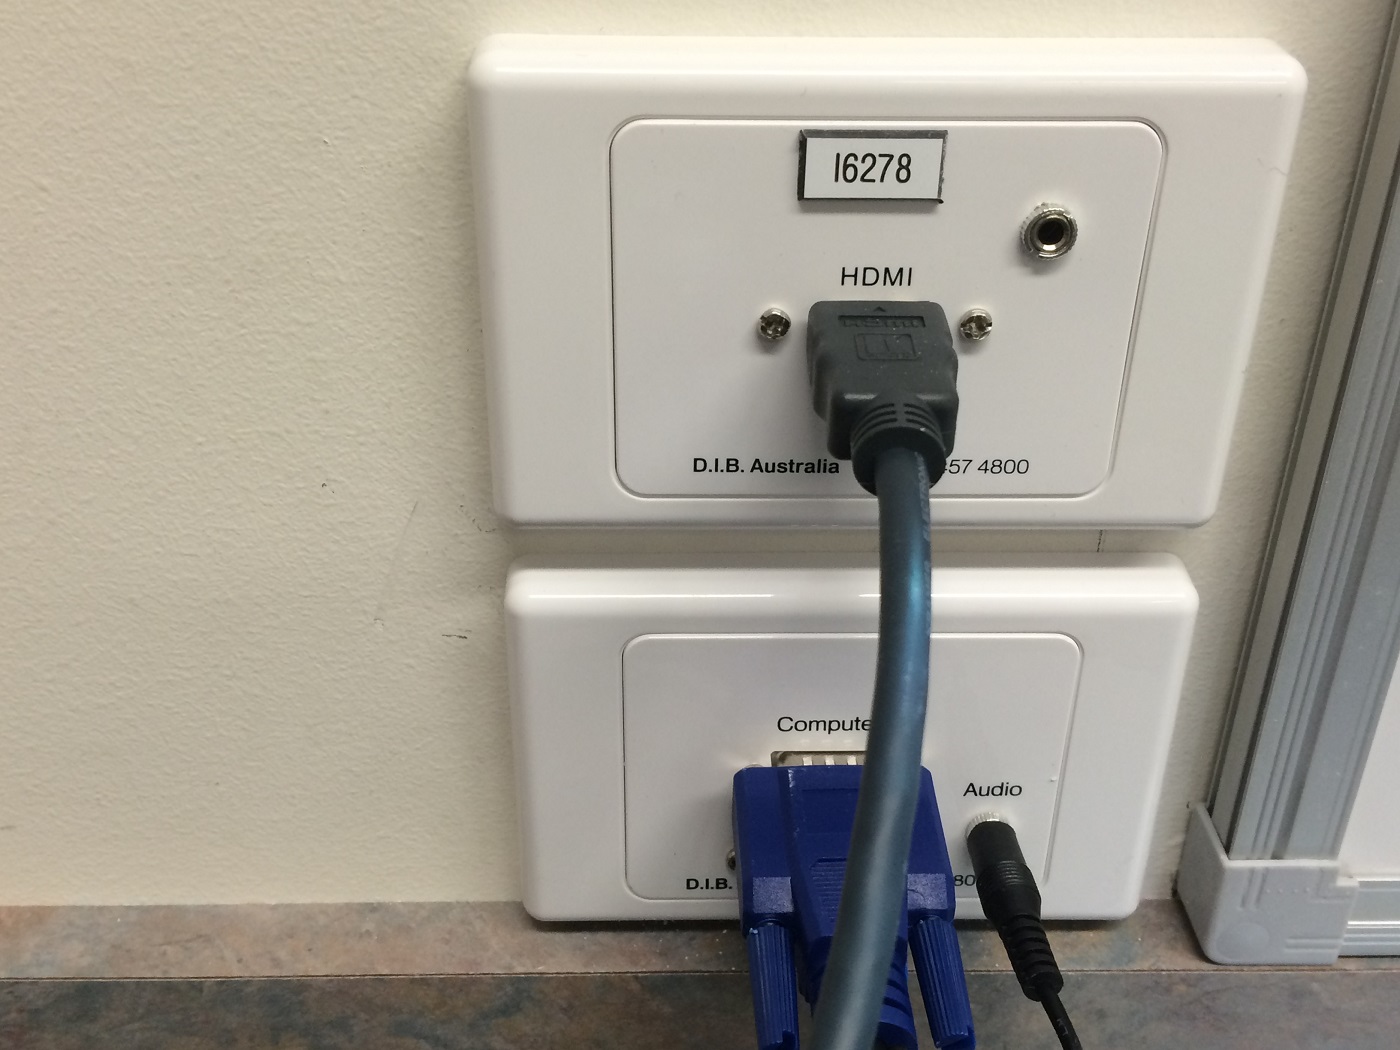
Top Input – HDMI, Lower Input – VGA + Audio
Then, more recently, projectors and LCD TVs started to come with interactive capabilities. This is where the USB connectivity comes in. If you don’t have USB connected to both laptop & projector, there the interactive component of the projector will not work.
Please watch the video below for a quick overview of these connections.
Please watch the short Video below to understand how to quickly and easily log a service job with DIB Audio Visual.
Click on the link to enter you service job request http://support.dibaustralia.com.au
In this short video, Sam will explain what EDID is and how this affects the resolution settings between your laptop / portable device and your display (TV or projector).
HDMI stands for High Definition Mulitmedia Interface. It is a method for transmitting audio and video data in a single cable. This makes it much easier to connect devices.
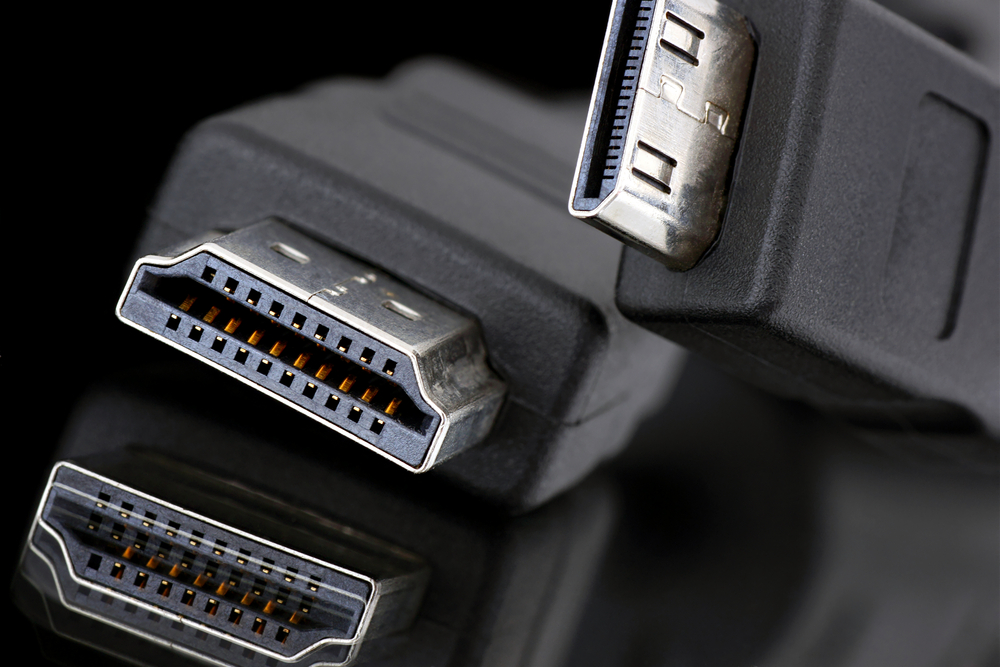
HDMI is the digital version of the older analogue VGA + 3.5mm audio connection.
HDMI has become the standard connection from portable devices to projectors or TVs. In the classroom, this is means a simplified, more reliable way of connecting your laptop or device than VGA.
If you have any questions related to HDMI or for assistance with your custom audio visual requirements, contact a DIB Audio Visual Solutions Consultant today Phone (03) 9457-4800 or contact us
Great news; your school or organisation has a NEW building project approved! You’re excited about the possibilities and benefits this new area will create for your organisation. In this Hints & Tips section, we will explore some aspects that will help smooth the process of the AV installations in your new building.
New building at local government school
As with any AV installations, the first step is to determine what exactly is needed in each space. This is no different with new buildings, except that there are several other parties involved in the process, including architects, builders and numerous other trade professionals.
A critical element to the success of any AV system in a NEW building project is the involvement of an AV integrator in the early planning phase of the project. Whilst many architects do an excellent job of designing beautiful and impressive modern buildings, these designs do not always lend themselves to creating workable, functional spaces for the installation of AV requirements. This is where an experienced AV consultant can assist in the design process and help create an excellent result.
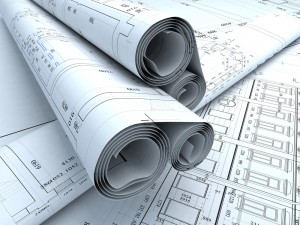
CAD Drawings for New Building
One of the main reasons for having an AV consultant involved early in the planning phase is so that wiring for the AV system can can be installed, before walls are plastered or permanent ceilings completed. This not only avoids lots of headaches for wiring later, but enables the AV design to be practical. This practicality ranges from the functionality of the AV system through to the “serviceability” of the system. Many of these important factors can get overlooked when the design phase does not included consultation with an AV consultant.
DIB Solutions Consultants have extensive experience in providing AV solutions with NEW building projects, particularly with planning and working effectively with all parties involved.
If you require assistance with a NEW building’s custom AV requirements, please contact a DIB Solutions Consultant on (03) 9457-4800 or contact us

Ah, the age-old question in AV; does display size really matter? In our 20 years of experience in supplying AV solutions to the education and corporate sectors, display size does matter. This is particularly true in the education sector, specifically within the classroom setting.
The main reason for understanding the importance of Display size is because if you want students to clearly read text on the main display, FONT size is important.
As a summary, display size more importantly has to do with height of an image (LCD or projected), which directly correlates to the height of fonts. This is of particular importance in an education setting, where students can be sitting as far away as 6m from the display. As you lower the size of a display (height), this can produce readability issues, which could present a huge problem in the learning process.
This potential issue is increased by the current types of content being used on the main display, which are often created on desktop/laptop devices. No longer is it just Powerpoint presentations, but collaborative learning such as using content from websites or Google documents.
To help understand, we’ll take a 100 inch, 4:3 ratio display as a reference point, which was the standard display for many AV systems in classroom approx 10 years ago. These AV systems gave a display height of 1.5m.
Many schools of recent times have been considering NEW LED TVs as their main display in classrooms (with a 16:9 ratio). Many of these are under 70 inch, typically 60 inch in size. With this size LED TV, the height of the display is 0.74m. This is less than HALF the height of the 100 inch display!

Visual comparison – 100 inch (4:3 ratio) and a 60 inch (16:9 ratio) displays
Another way to explain screen size importance is by looking at differences in FONT sizes. If you displayed the same text at 10 font and 20 font on the same screen, representing the 60 inch TV and the 100 inch displays. Then gradually walk backwards. It wouldn’t be too long before you can’t read the size 10 font.
It’s this dedication to educating clients on these types of aspects of an AV installation that make DIB Audio Visual a class leader in the AV industry.
For more information about display sizes or if you require assistance with a NEW building’s custom AV requirements, please contact a DIB Solutions Consultant on (03) 9457-4800 or contact us
DisplayPort is a digital display interface. By using a Display Port connector (or cable) you can connect a video source to a display device, such as a TV or computer monitor. DisplayPort can also be used to carry audio and USB data.

Display Port connector

Diagram of DisplayPort Connector
An important point to note is that while Display Port and HDMI connectors look similar, they are different and not interchangeable. DisplayPort connectors have 20 pins and are available in two sizes: DisplayPort and Mini DisplayPort (the latter is the port of choice for Microsoft’s Surface Pro tablet).
Whilst Display Port supports Full-HD resolution (1920×1080), it does not appear on as many devices as HDMI, hence the reason not as many people know about it.
If you have more questions about Display Ports or how their suitablity to your custom audio visual requirements, contact a DIB Audio Visual Solutions Consultant today Phone (03) 9457-4800 or contact us
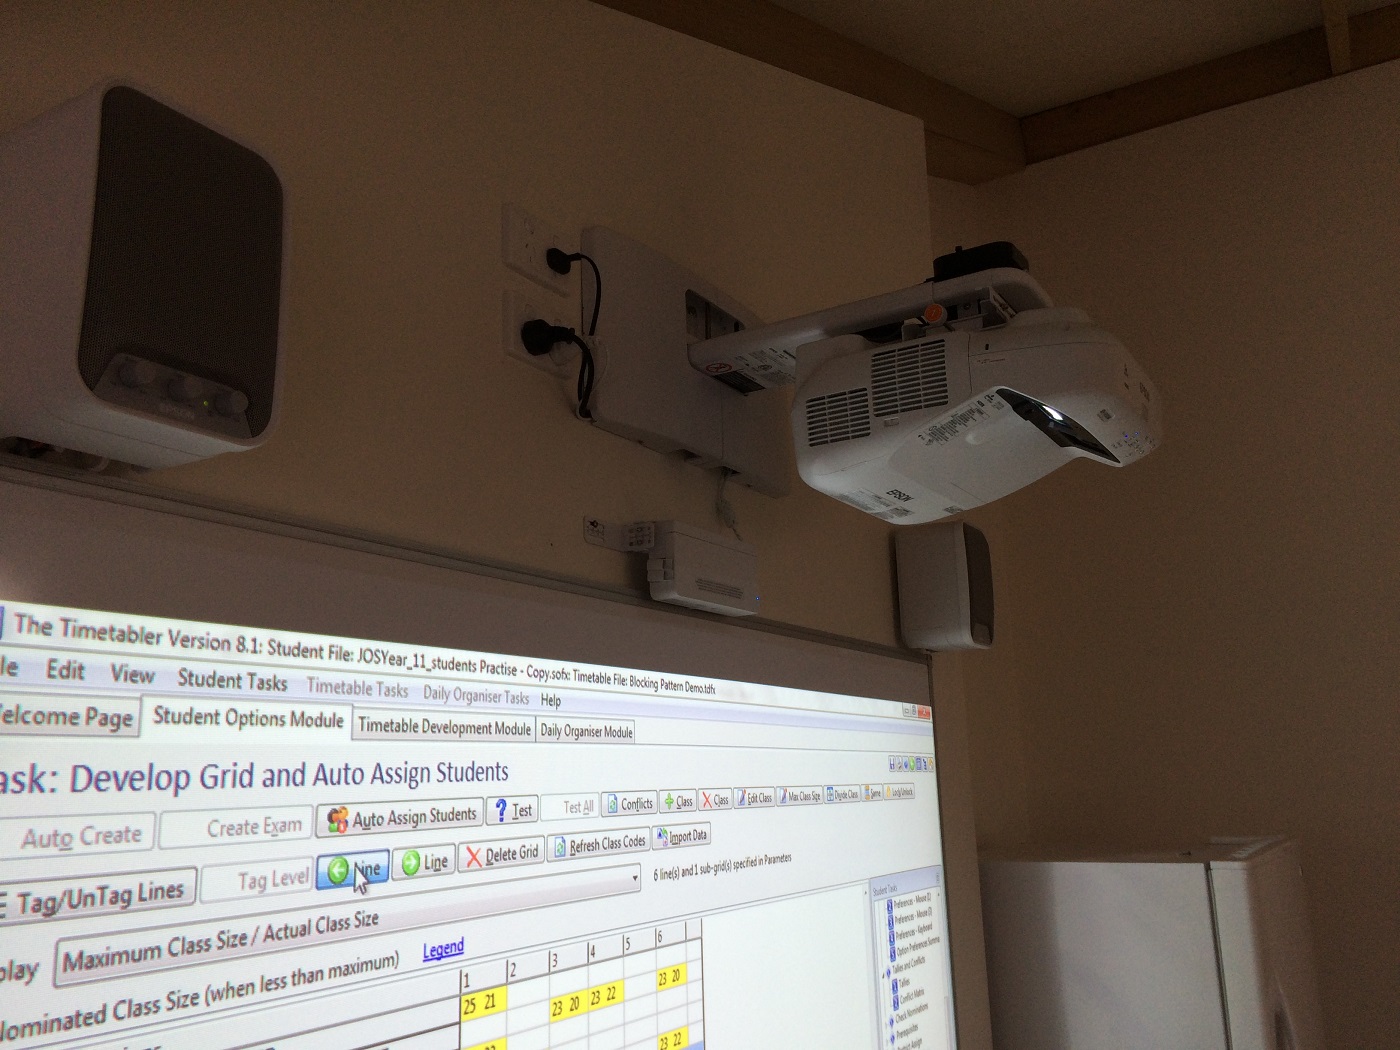
This FAQ is to help assist you in choosing the correct whiteboard size, when also using it as a projection surface. The following types of projectors are classic examples; Short Throw (typically 0.8 – 1.3m from the board) or Ultra Short Throw projector (typically from 0.8m – 0.6m from the board).
When considering this topic, it’s important to ask; what subject is being taught in the space? For example, a Mathematics teacher generally likes to have lots of room to write on the whiteboard (typically 2.4m – 3m in size), whereas other subjects may not require as much room for writing.
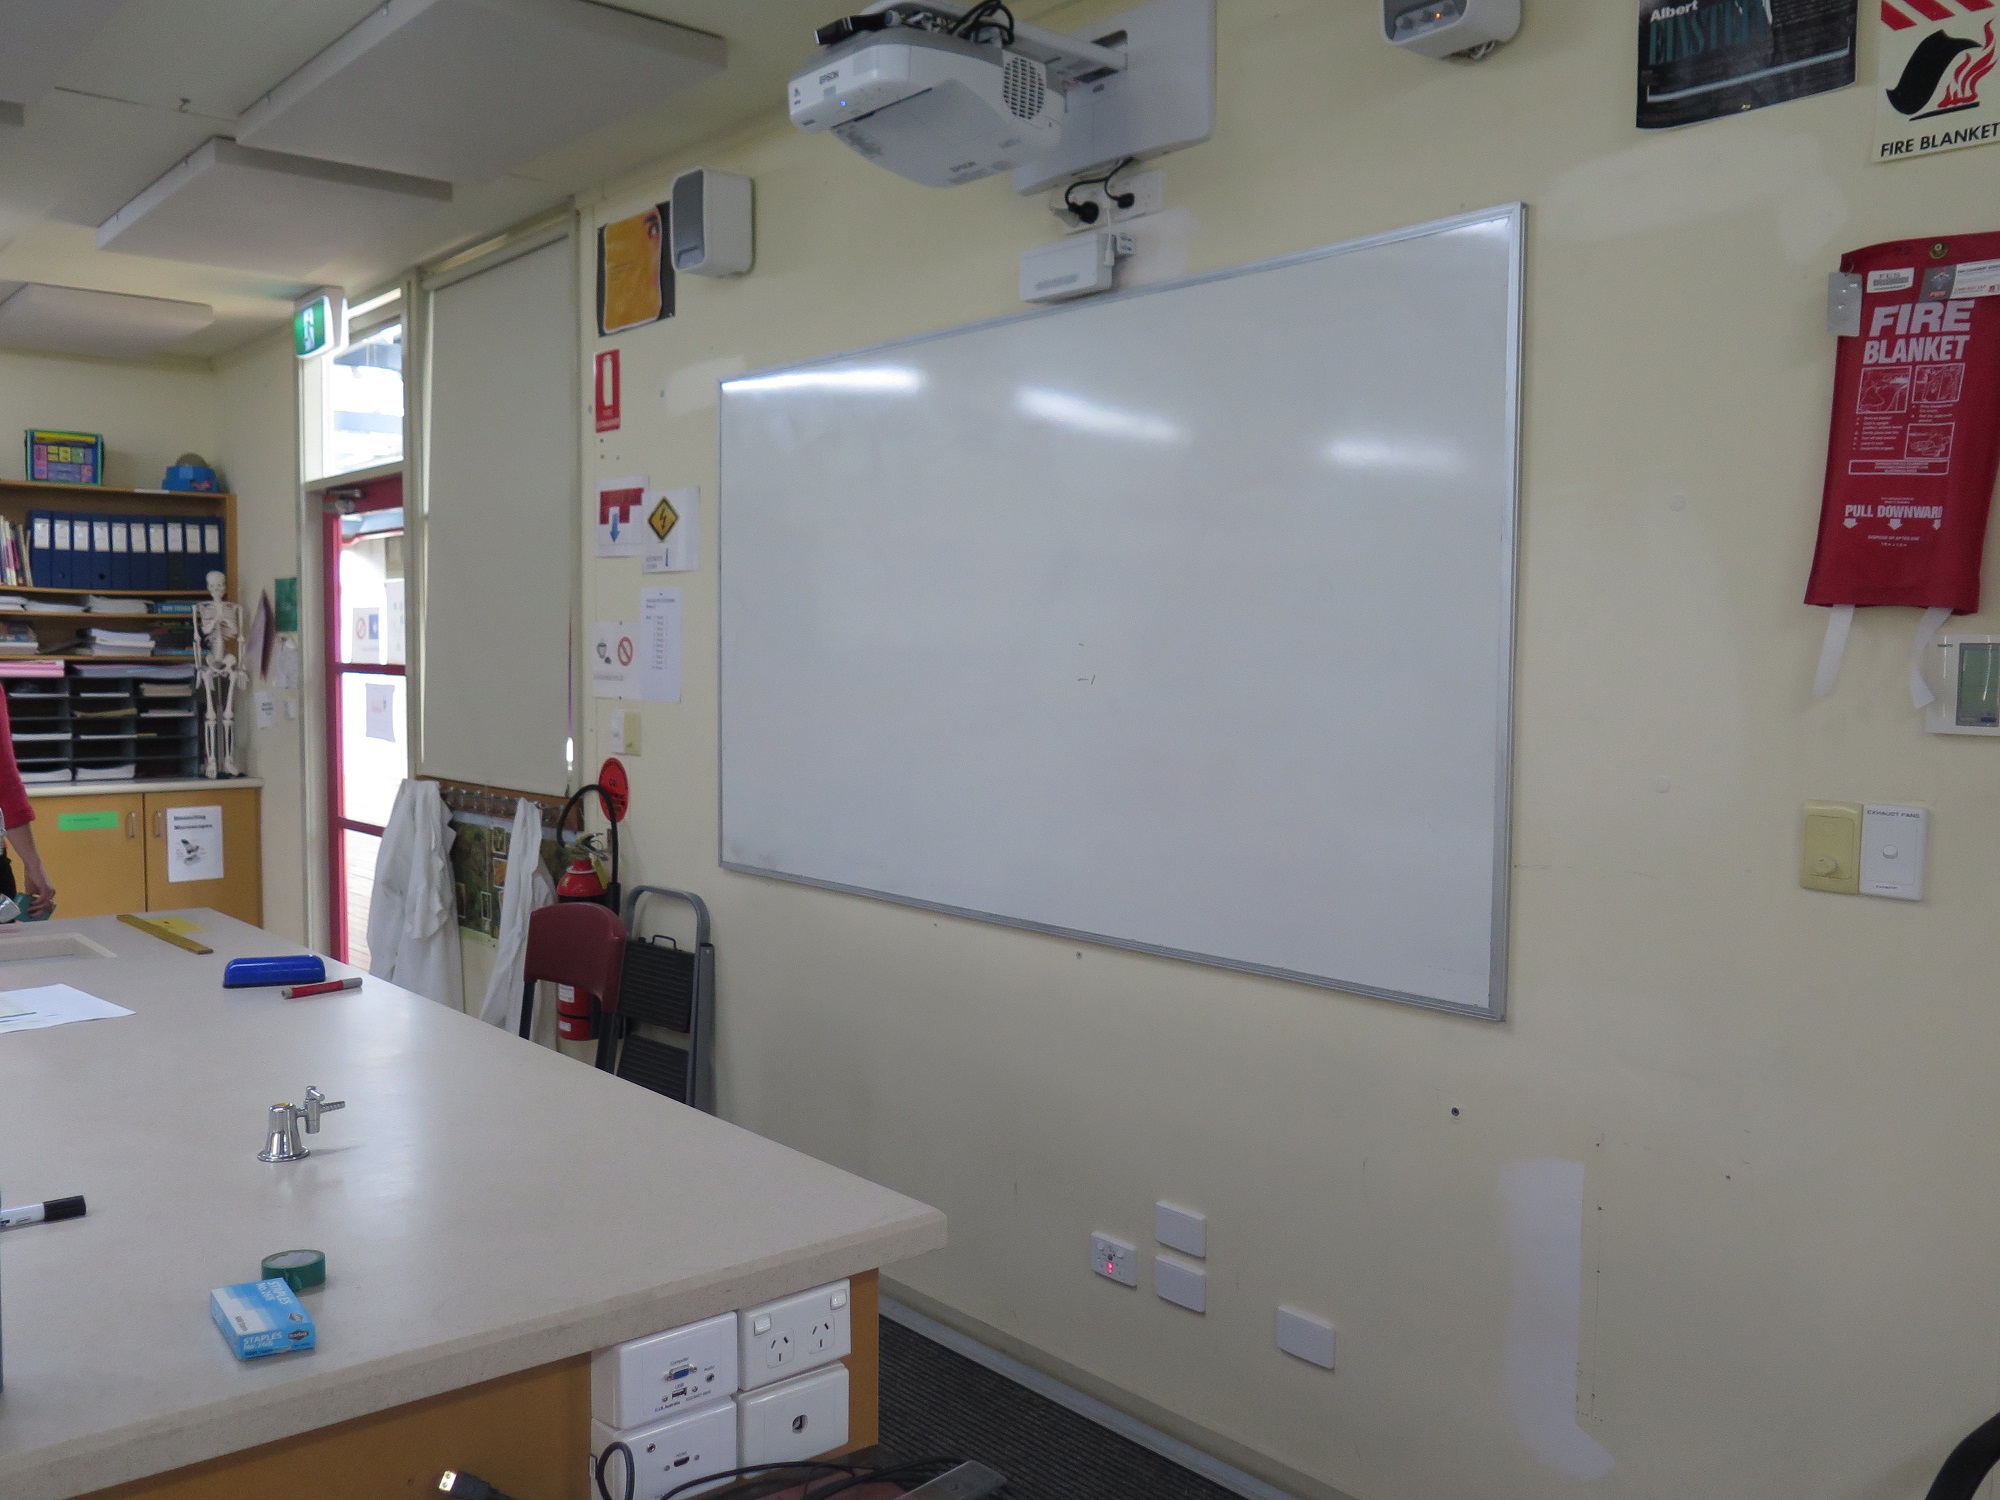
Commonly across schools, whiteboards are 1.2m high. This would allow you to project an 86 inch image, in a 16:10 format (widescreen).
With many Ultra-Short Throw projectors enabling images to reach close to 100 inches in size, a larger whiteboard would need to be considered for these projectors. For example a 96 inch image in 16:10 format, would require a minimum whiteboard height of 1.4m. This is to accommodate the finger touch module in the Interactive Projectors, such as the Epson Epson EB-595wi or EB-1430Wi. For best touch results for the laser curtain (inside the module), they should be mounted on the whiteboard itself. This will produce maximum touch connectivity and reduces tracking issues across the surface of the whiteboard.
Mounting of whiteboards is typically 900mm above the floor. This will give good access to the top sections of the projected image on the whiteboard and represents a good working height.
If you take theses factors into consideration, you will end up with a much better result for your classroom.
The examples given here should be used as a guide only.
For accurate height and width calculations for your whiteboard or assistance with your custom audio visual requirements, contact a DIB Audio Visual Solutions Consultant today. Phone (03) 9457-4800 or contact us
Before putting in a new projector, it is important to firstly assess your existing whiteboard. The question is – Is it really flat? This can easily be checking by putting your head against the whiteboard and looking down the length of the board to see if there are any gentle waves or distortions you can see.
For traditional use of a whiteboard, these imperfections would be of little concern. But, as this FAQ section is about using a whiteboard with an Ultra Short Throw projector (which projects the image from an extreme down-angle), this can present significant issues on a slightly warped or wavy board. These slight defects or distortions in the board can cause a bend of the image. This is evident in the image not being square or symmetrical and sometimes having waves going through the image.
As DIB provide high-quality AV installations and service, this whiteboard flatness is of high importance when installing an Ultra Short Throw projector. As such, we recommend specific types of whiteboards that represent a high integrity for flatness. These types of whiteboards include surfaces that have an porcelain or ceramic (vitreous enamel) finish, which is stuck onto a plaster substrate (the backing behind the whiteboard surface is of a thick plaster material). This type of construction helps produce solid flat whiteboards.
This can be the difference between an economic AV install resulting in a less-than-desirable image and an excellent image, from a high-quality, long-lasting AV installation.
If you have any questions related to quality of whiteboards or need assistance with your custom audio visual requirements, contact a DIB Audio Visual Solutions Consultant today Phone (03) 9457-4800 or contact us
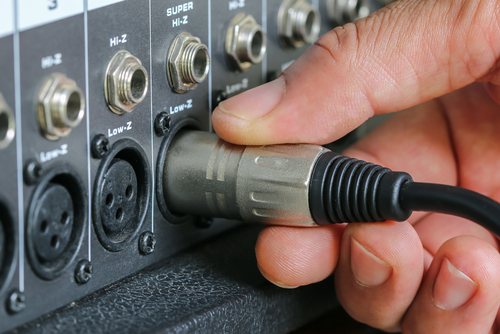
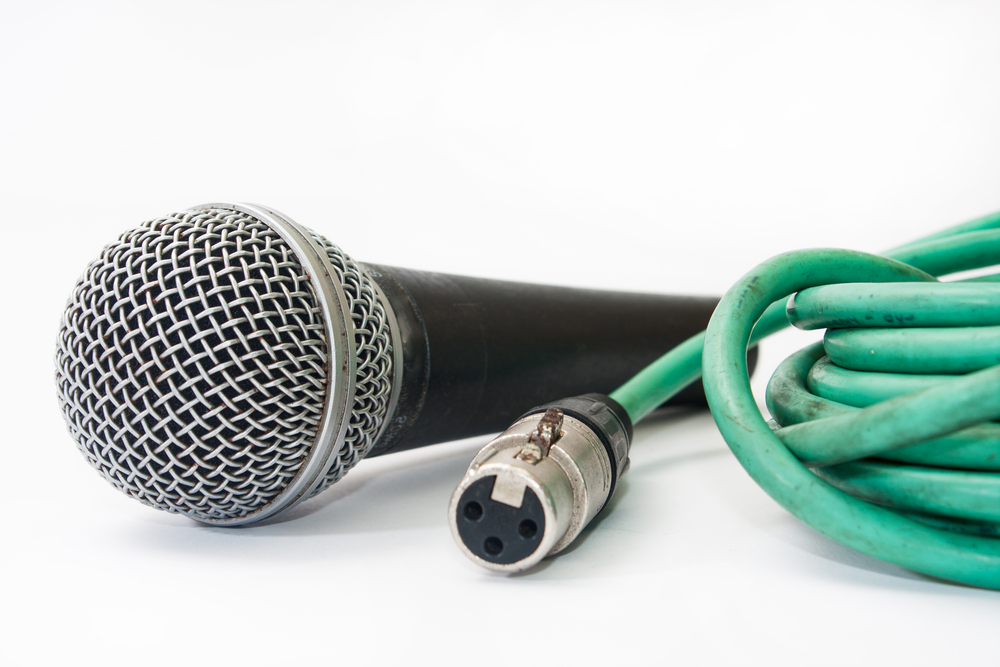
An XLR connector is a popular audio connector featuring 3-7 pins. The most common style is the 3 pin pattern, with two for sending signals and the third works as an overall system grounding (or earth). The primary application for XLR connections is to carry audio signals to interconnected powered speakers, commonly used in a PA system.
A key feature of the XLR connector is the locking mechanism that “clicks” the connector into place and helps reduce the risk of cables disconnecting. You can have either a Male and Female end to an XLR connector.
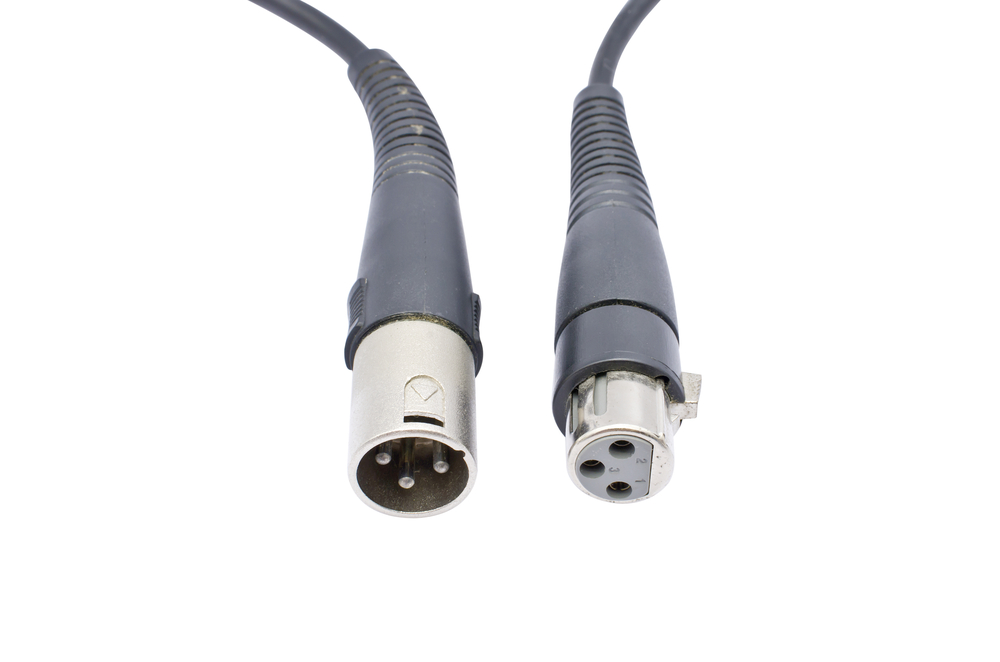
Male & Female XLR connectors
Other variants of XLR connectors
4-Pin – Standard connector for Intercom Headsets
5-Pin – Commonly used in digital lighting control, namely DMX512. Also used with stereo microphones.
6-Pin – Dual-channel intercom systems and applications for stage lighting control.
7-Pin – Remote control of several models of fog machines, including Le Maitre & Ultratec. Also used to connect some value condenser mics to their power supply.
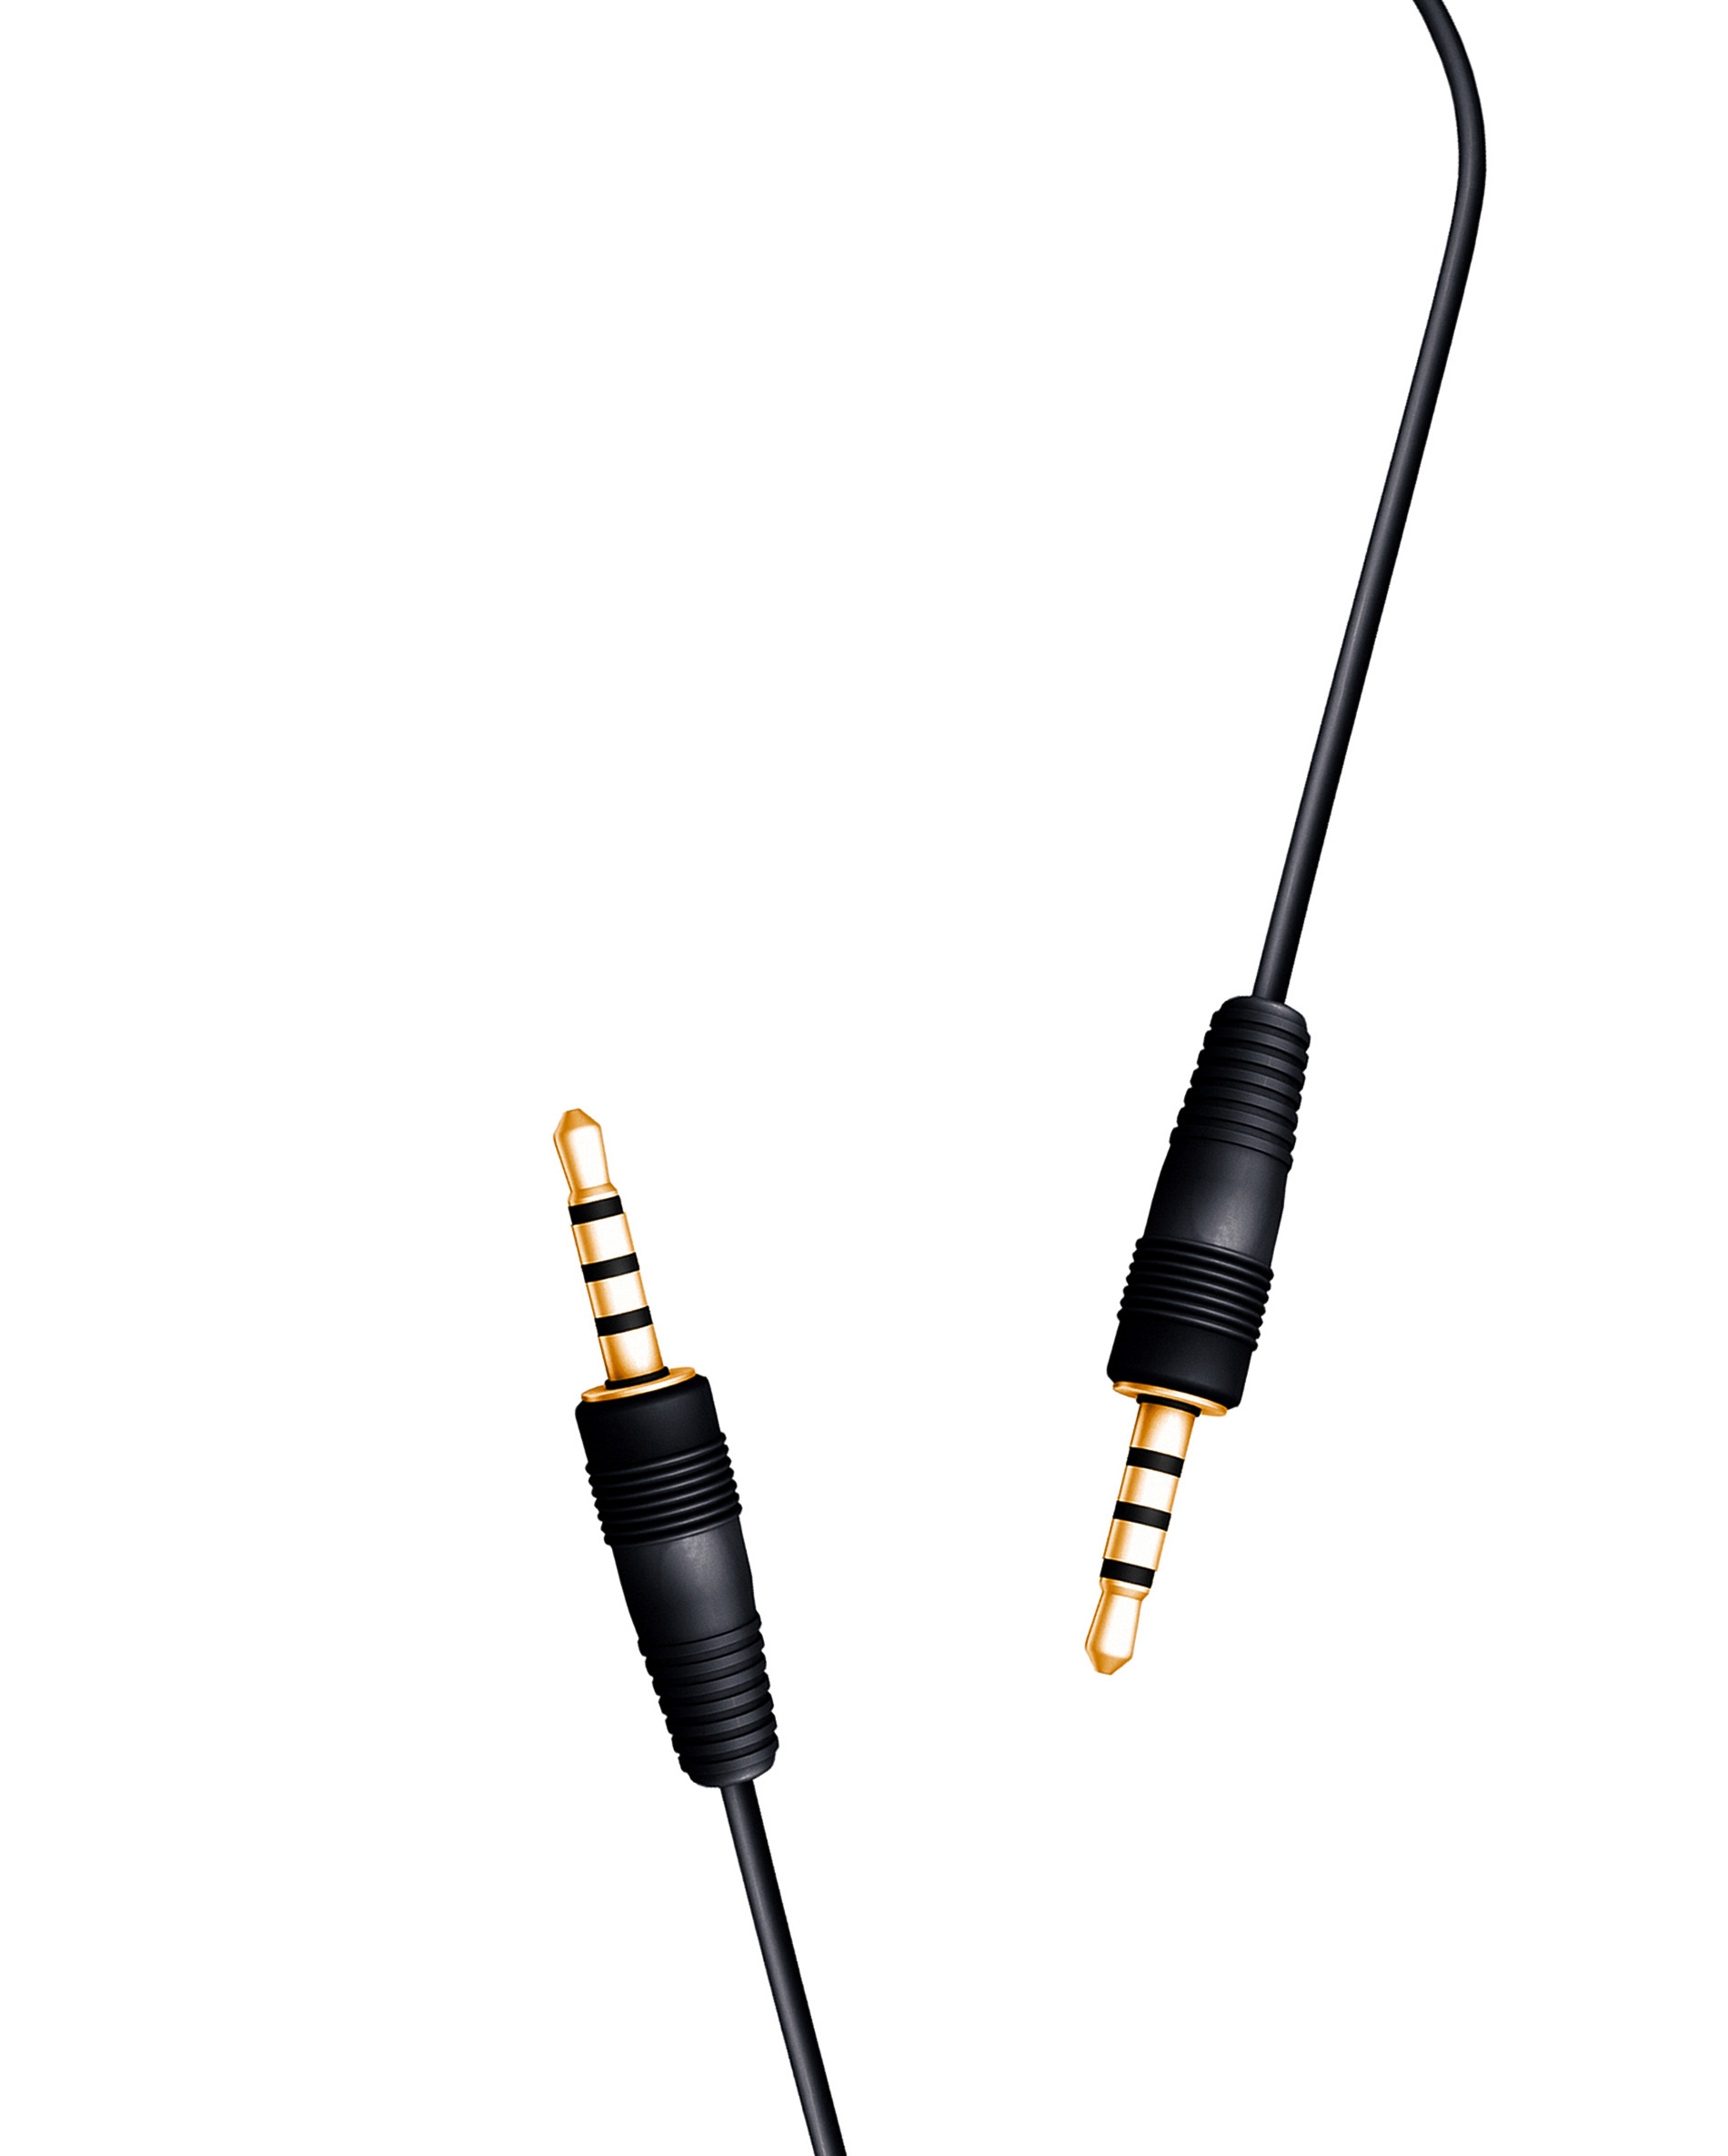
A 3.5mm connector has been typically used in AV systems to provide the Audio component for a VGA connection. This is also why there is no audio if either end of the cable is not connected to your laptop/device or AV system input plate.
Other commonly used applications for the 3.5mm connector are headphones for mp3 players, such as an iPod.
A more recent application for the 3.5mm connector is for Audio-Only playback in an AV system. This is a popular option, as it allows for audio playback without the need to turn on the whole AV system. Plugging one end of the 3.5mm connector to the input plate and the other to your device, you can now play music or audios using the speakers in the space.
These are the three most commonly used applications for the 3.5mm connector. If you have other questions about the 3.5mm connector or for more information about audio-only playback in an AV system, please contact a DIB Solutions Consultant on 9457-4800 or Contact Us
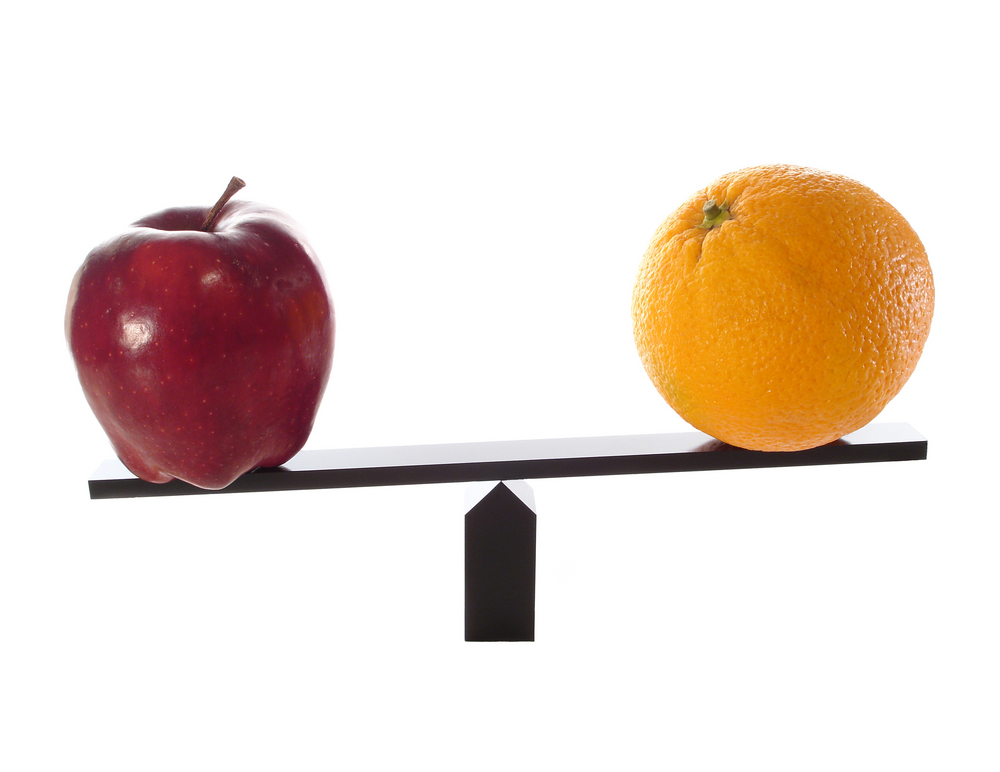
Sometimes comparing AV quotes is like comparing apples and oranges!
So you have 10 classrooms ready for an AV upgrade?
Maybe you’re putting in an AV system for the new boardroom?
>> The question really is… How can you make sure you’re comparing the same thing?
To make things easier, DIB Audio Visual have designed an easy-to-use Quote Checklist to assist you in comparing AV quotes.
To get the Free AV Quote Checklist, CLICK HERE
You don’t want to get a lemon (or an orange), if you were looking for an apple!
For further assistance with regarding an AV quote, please contact a DIB Solutions Consultant on 9457-4800 or contact us
Mirrorcast is a wireless display standard that does away for the need for a HDMI cable connection. It’s main purpose is to allow wireless mirroring of content from a portable device, such as a smartphone, tablet or laptop. It is designed to work across multiple-platforms, unlike many other offerings on the market.
A main benefit of Mirrorcast over other wireless technologies is that it doesn’t impact on your school or business network. This is because the devices make a direct WiFi connection; no routing involved. With this configuration, this also creates a security feature in corporate environments, where visitors can connect and share without using the main network. This can also be applied to boardrooms or meeting rooms within school settings.
Alternatives to Mirrorcast include Apple Airplay, Google Chromecast, Intel WiDi and DLNA. These have other benefits or limitations in comparison to Mirrorcast.
> Miracast can securely transmit video up to 1080p with 5.1 channel sound.
Mirrorcast supports the following OS
– Windows 8.1
– Windows Phone 8.1
– Android phone/tablet Android 4.2 or above
– Amazon’s Fire OS
For more information about Mirrorcast technology or for assistance with your custom audio visual requirements, contact a DIB Audio Visual Solutions Consultant today Phone (03) 9457-4800 or contact us
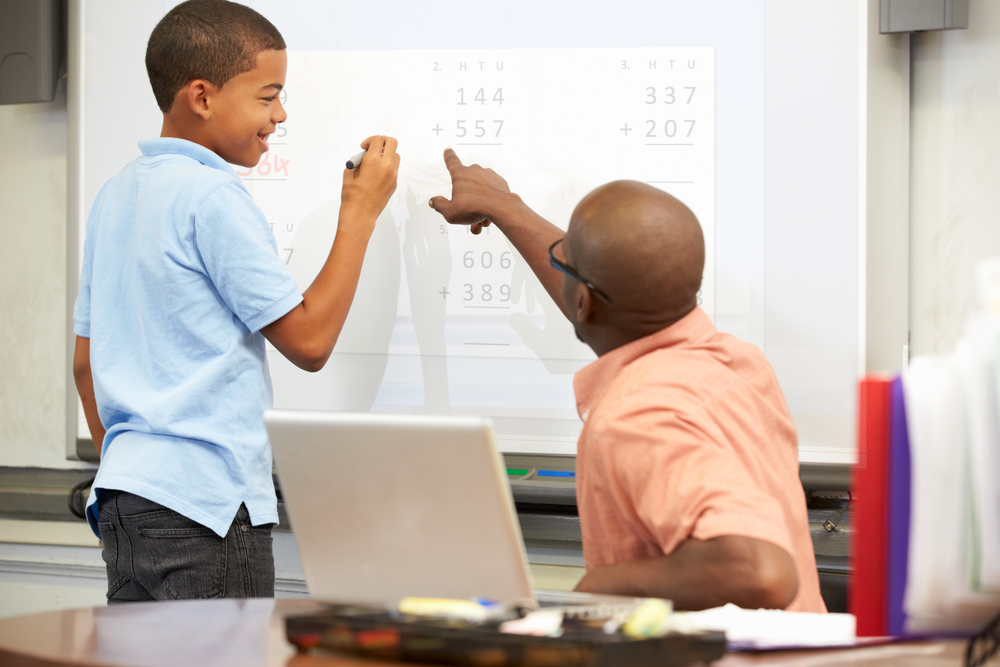
An interactive whiteboard is a display that allows you to interact with the projected image, using content connected from a laptop, PC or portable device. This projection is normally onto a whiteboard surface, hence the name “interactive whiteboard”.
Once connected (via USB), the content from the device is then projected onto the whiteboard surface, where special pens or your finger can work as a mouse (like a big, touch-enabled desktop computer).
This unique technology allows you to manipulate the content on the whiteboard, including website navigation, interactive educational programs or editing displayed content. Many newer models feature wirelessly display capabilities, with the ability to display content from other devices for a truly collaborative classroom / workshop / meeting.
Companies that manufacture IWB products including Epson, Hitachi, NEC, Sony, Benq and many more. In a similar comparison to cars, all projectors are not created equal. Projectors are differently designed and this can contribute to many things including performance, sharpness and maintenance.
It is important to do your research about projectors and talk to an AV industry expert to determine differences if you are at all unsure.
As a reference point, many agree that Epson are a leader in the field of projector technology. Two excellent examples of are the Epson EB-595Wi and Epson EB-1430Wi interactive projectors.
For assistance with your IWB AV installation or enquiry about specific IWB technology, please call a DIB Solutions Consultant on 9457-4800 or contact us
To find out how an IWB differs from a Touch Screen, please click here.
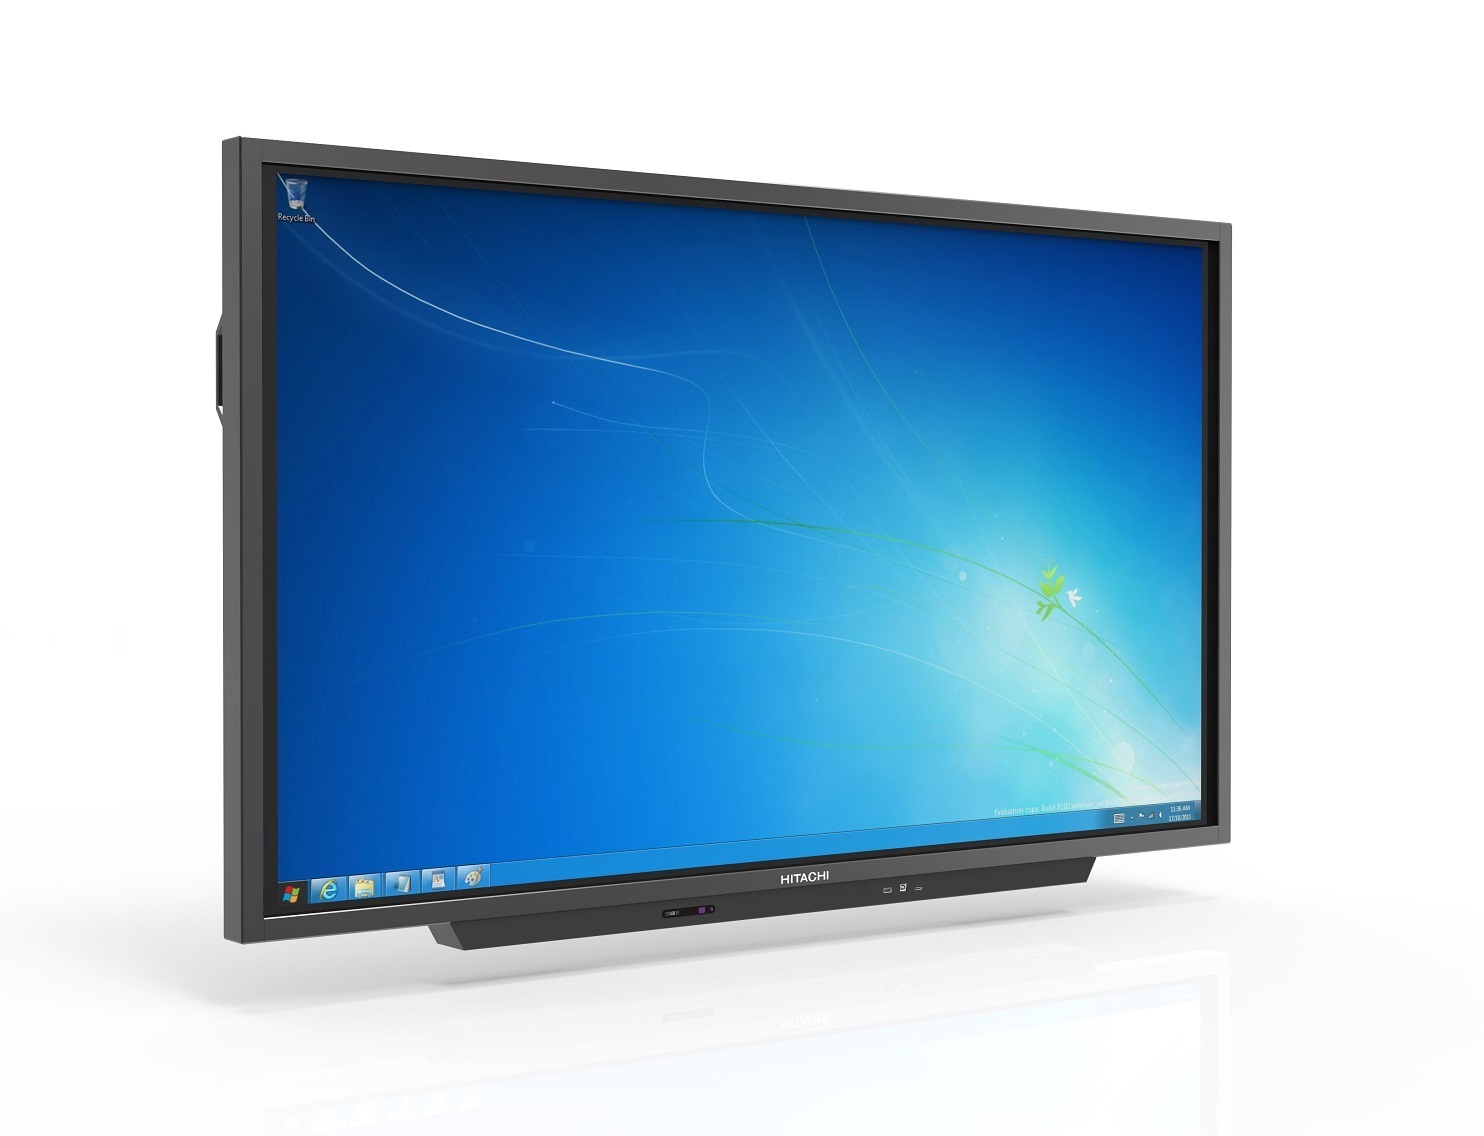
An interactive touch screen is an LED or LCD panel with a touch enabled screen. This unique aspect of the screen allows you to interact or touch, manipulating the content displayed. This is typically from a laptop or from digital signage technology. Generally this technology uses a combination of sensors and cameras either at the edge of the screen or as an overlay, to enable touch functionality. This detects the proximity of the finger/pen and engages the desired function in the specific area of the screen.
These interactive touch screens come in sizes ranging from 55” up to 85 inches. Features of an Interactive touch screen include a pen or finger-touch enabled screen, giving an accurate touch experience. Along with this are interactive, collaborative opportunities for learning or presentations, with others able to contribute either on the screen or via a wireless-enabled device.
Brands in of Interactive Touch Screens include Hitachi, Philips, CommBox, Samsung amongst others.
To find out more about Interactive Whiteboards (IWB), CLICK HERE.
To read our FAQ on What’s the difference between an IWB and a Interactive Touch Screen, Click Here
For more assistance with IWB’s or Touch Screen panels, please contact a DIB Solutions Consultant on 9457-4800 or contact us

So you may be thinking, what’s the difference? To get an overview, have a look through the table below. The main differences between the two technologies are the following…
Interactive Whiteboard (IWB)
> Projector (source)
> Mounted
> Surface – Whiteboard
> Less expensive (per inch)
> Less bright
> Larger display size (almost 100 inch)
> Interactive touch capacity built in
> Set height
Interactive Touchscreen Panel
> Panel (source)
> Mounted or mobile (extra cost)
> Surface – Screen of panel
> More expensive (per inch)
> More bright
> Smaller display size (up to 85 inch panels)
> Sometimes requires optional touch overlay
> Height adjustable (on a trolley)
Both are interactive technology and provide a touch interface as your main display. Generally connection to the display is via HDMI or VGA, using a portable device, such as a laptop, tablet or a PC.
If you require assistance with helping determine what is the best technology for your specific space, then please call a DIB Solutions Consultant on 9457-4800 or contact us
For more information on Interactive Whiteboards (IWBs), Click here
To read more about Interactive Touchscreens, CLICK HERE
UHD stands for Ultra High Definition and indicates the resolution of a display, like the more commonly known Full-HD. There are two forms of UHD; 4K and 8K. The best way to understand this is to reference it to Full HD, which is 1920 x 1080 resolution. (16:9 ratio)
From Full-HD to 4K the pixel count doubles and then it doubles again from 4K to 8K. To get a better understand of this, have a look at the picture below.

> 4K UHD resolution is 3840 x 2160.
> 8K UHD is even higher, at 7,680 x 4,320.
(Both 4K & 8K UHD are measured in a 16:9 aspect ratio – widescreen)
Not only is there more pixels, but the dynamic range of highlights and shadows are further enhanced in UHD over Full-HD. To better understand the jargon of screen sizes, display sizes are commonly referenced by their height (1080p (Full HD), 2160 (4K), 4320 (8K).
4K is the new frontier, with more and more content being made available everyday. There are even a number of affordable options for recording devices, including many DSLRs cameras and video cameras in the consumer market. Even the new iPhone 6 mobile phones are capable of recording 4K content.
With 8K video recording devices costing up to $20,000, content at this level is the next medium that will become the eventually become the norm, but this may be a little while off yet before is becomes at a consumer level. There is not a lot of content available at present. This, like a most new technology, this is mainly due to the prohibitive factor of cost.
If you have any questions about UHD or require assistance with your custom audio visual requirements contact a DIB Audio Visual Solutions Consultant today. Phone (03) 9457-4800 or contact us
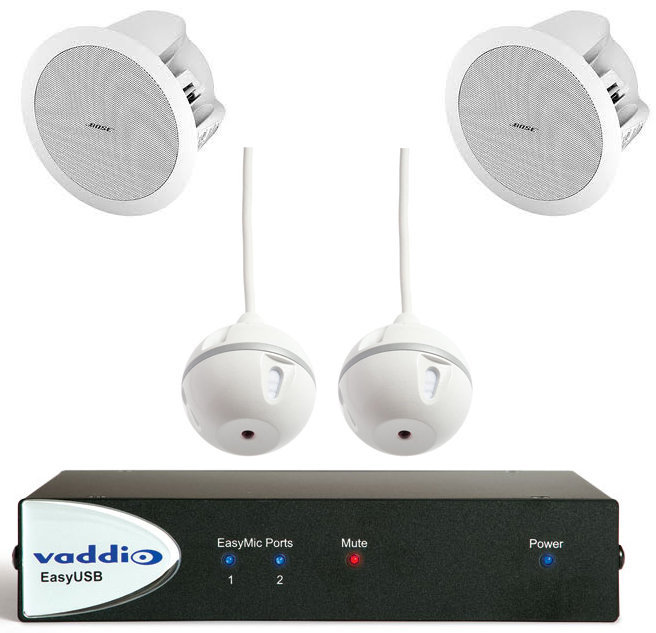
Vaddio Easytalk system with Echo Cancellation technology
Echo cancellation is a means of eliminating echo from an audio path. For example, echo may occur in a video conferencing or audio conferencing situation. The technology works by first detecting the original transmitted signal that reappears (with some delay) in either the the transmitted or received signal. Once this echo is recognised, it can then be removed from the transmitted or received signal, thus eliminating the echo that was there. This is why echo cancellation technology is of particular importance with Video / Audio Conferencing.
The diagram below illustrates how sound waves are reflected and create an echo. This is the signal that a microphone would pick up and re-broadcast in a Video / Audio Conferencing situation. The echo cancellation technology recognises the same signal has appeared twice and removes it before it is rebroadcast.
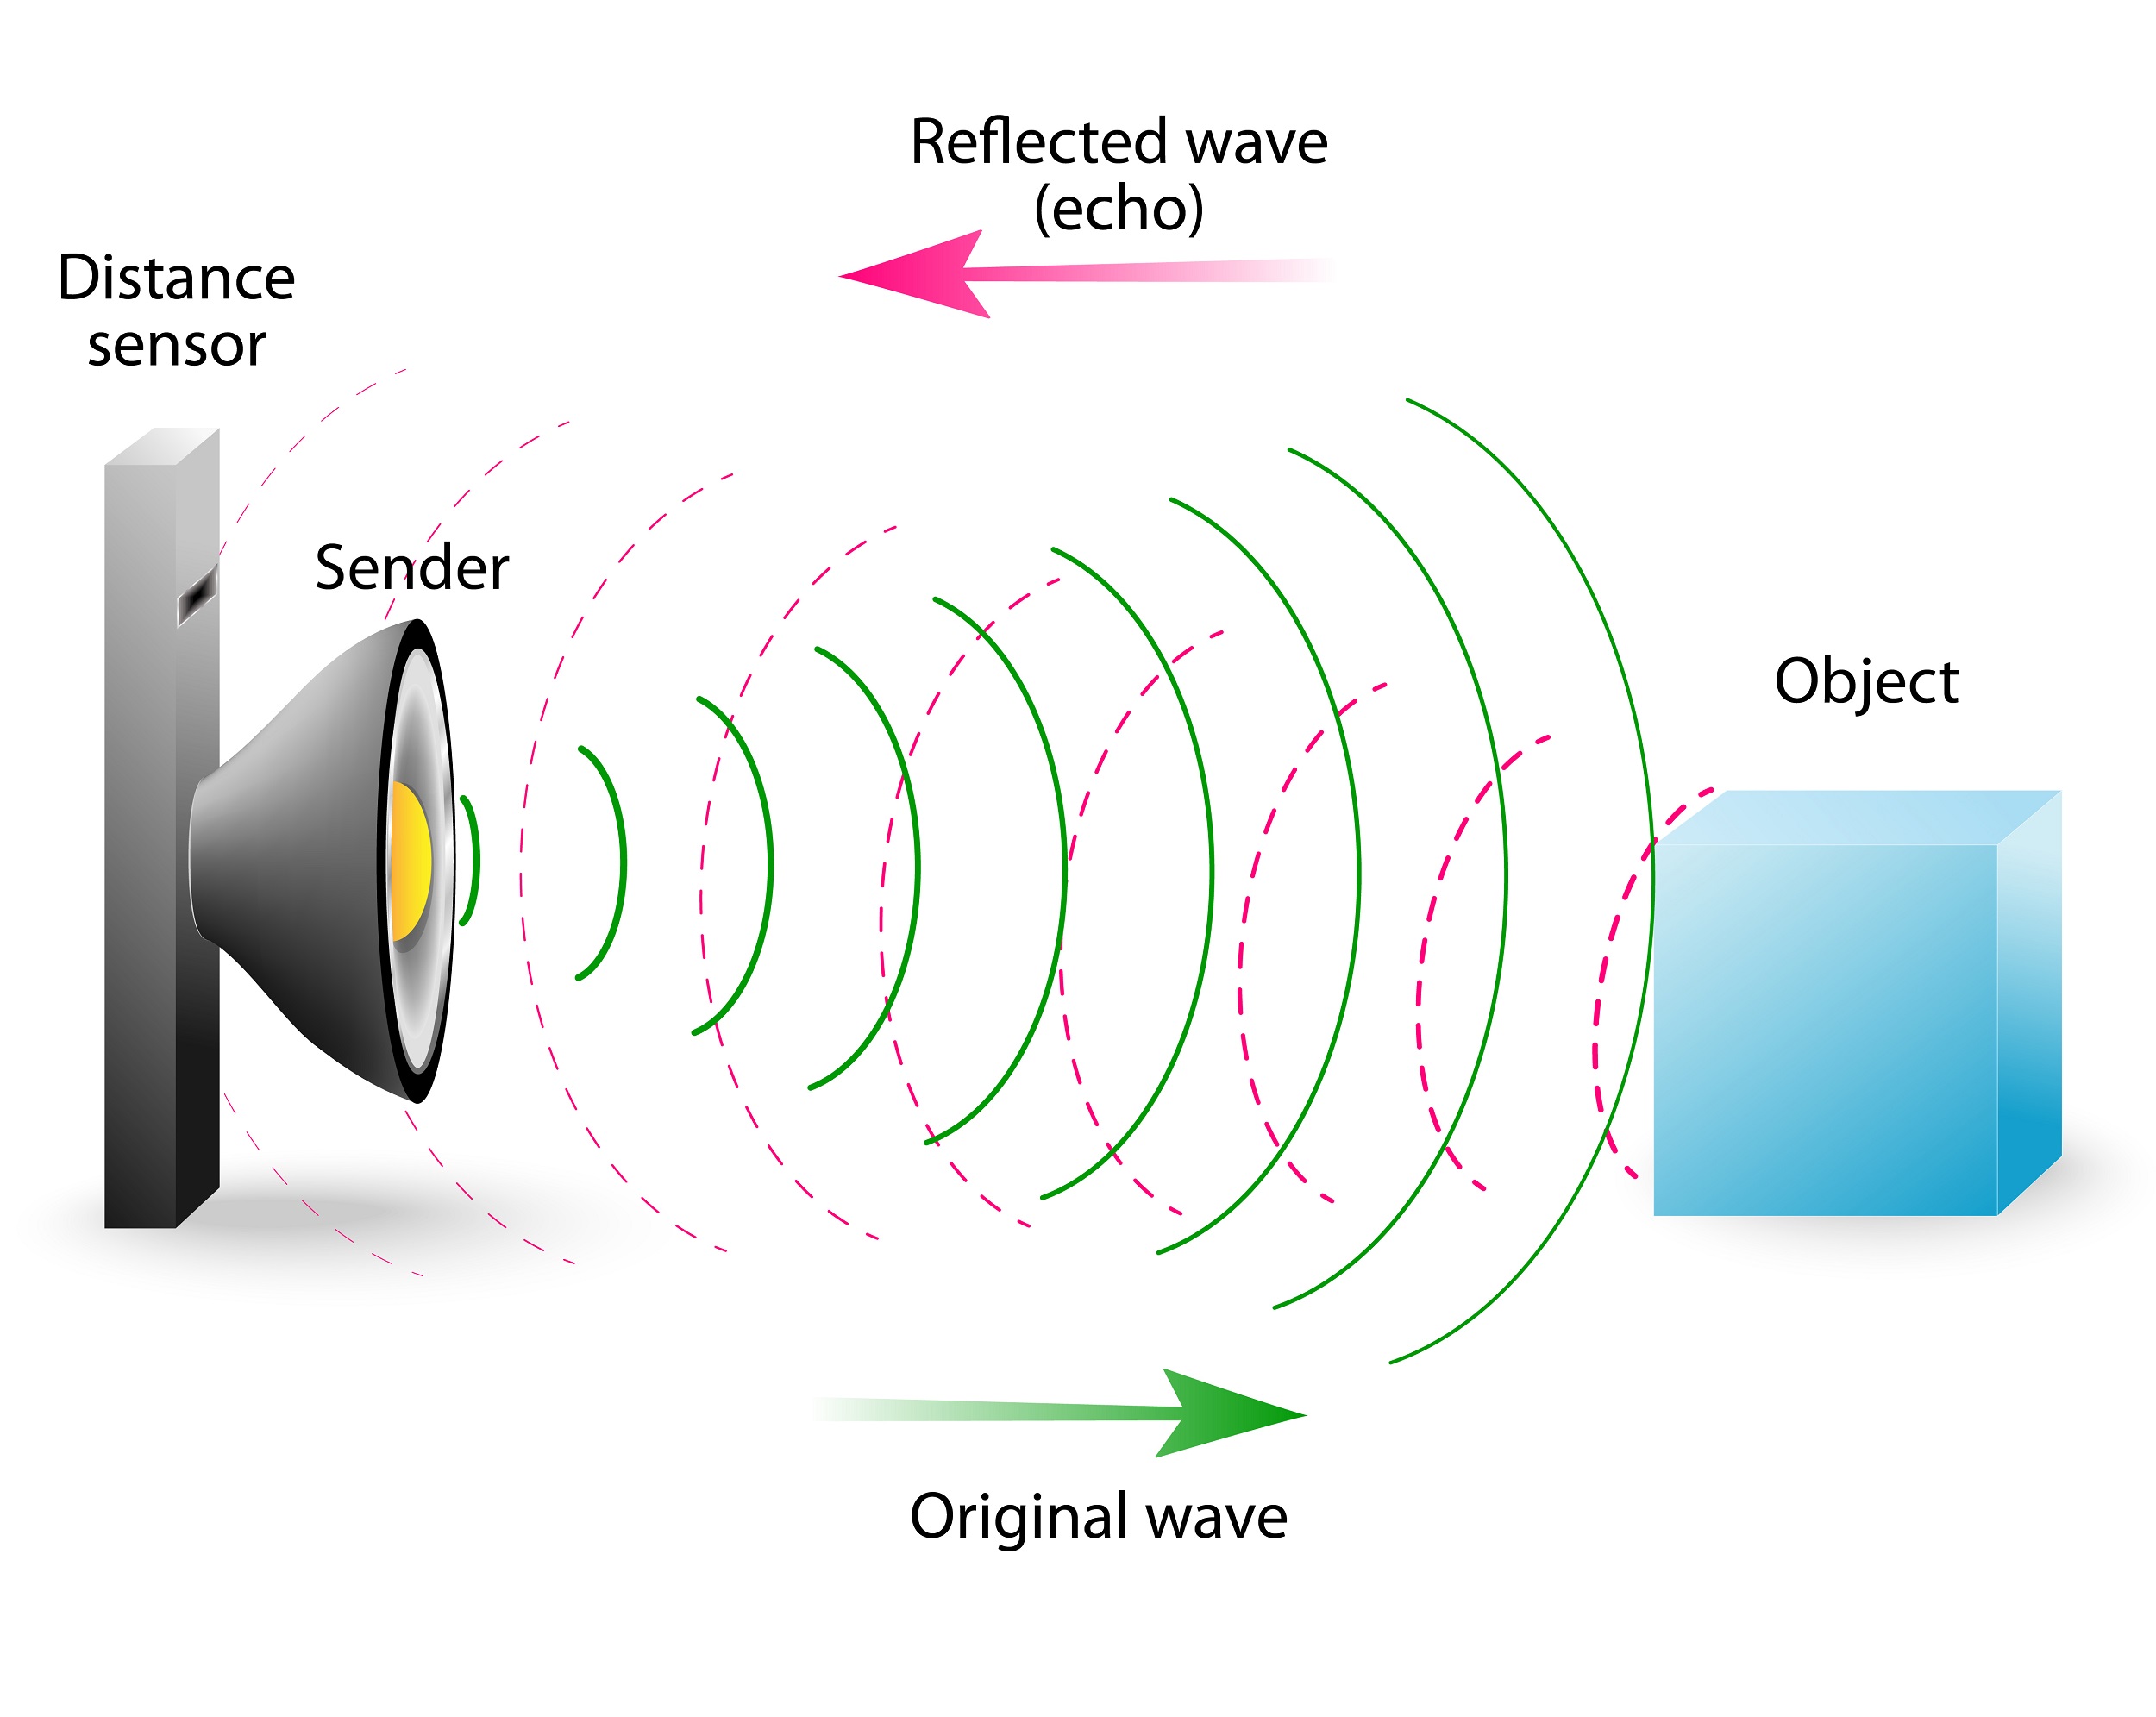
Visual diagram of how echo can effect audio in video conferencing
Some of the video conferencing (VC) technology brands within the AV industry include Vaddio and Polycom. Both of these brands produce high quality simple solutions for video conferencing, with echo cancellation technology built in. There are many offerings in the marketplace, however, Vaddio and Polycom have high quality, straightforward systems that we know are generally of a high standard.
In most instances, audio, not video, is the vital part of a video conference and where communication can break down. Having high quality echo-cancellation technology built into your video conferencing AV system can help eliminate this and give you a pleasant video conferencing experience.
For more information about echo cancellation technology or for assistance with an AV design for video conferencing, please contact a DIB Solutions Consultant on Phone (03) 9457-4800 or contact us
So your school experienced a power blackout or surge. Your projector which was working beautifully is now asking for a password when it turns on. What do I do?
I’m glad you asked!
It’s a simple solution to reset your projector and get it up and running again.
All you need to do is
1. Press and hold the “NUM” button on your Epson remote (see photo below)
2. Whilst holding down the “NUM” button, press the numbers “0000” (ie. Press zero 4 times)
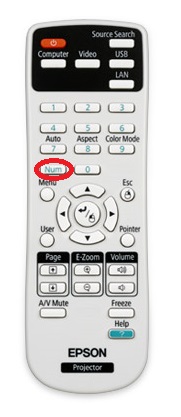
Epson Remote with “NUM” button highlighted in RED
This will reset your projector and you are now up and running. Voila!
If you are experiencing any other AV issues, please log a Service Request by CLICK HERE
or call the DIB Service Department on 9459-000
Sometimes a projector will seem to be not working, but this could be caused by something as simple as a loose plug. The following are some easy solutions to issues that we have seen with projectors:
Solution: This occurs in EPSON education projectors when the input isn’t connected properly. If this happens, simply ensure that the cable is properly plugged into both the wall plate and the laptop/computer. As soon as you connect this cable properly and choose the right source on the control panel this error page will dissapear.
A VGA cable securely plugged in to a wall panel
Solution: First, check the projector’s filter for dust build-up. If the projector is still turning off, it is likely that the internal fan or ballast may be at fault. This can be a result of not servicing your projector regularly. If this is the case contact the DIB service staff as the projector needs to be repaired.
Solution: This issue might happen when using a VGA input. It can be solved by making sure that the VGA cable is fitted firmly and completely in the wall plate and laptop. Otherwise, it might be that the pins in the VGA cable are damaged or out of place. This can be fixed by using a new or different VGA cable.
Remember to look after your projector and regularly service it so that it can run optimally.
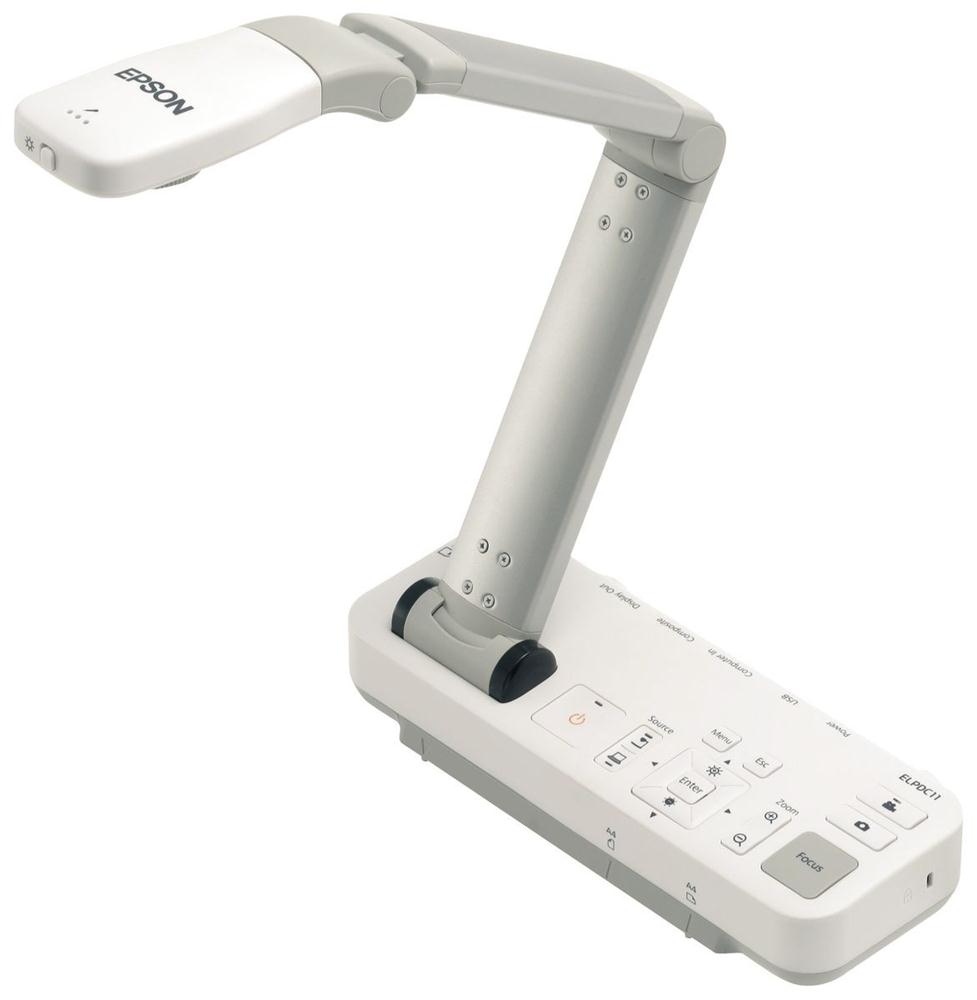
Some people have had issues with the Epson ELP-DC06 Document Camera/Visualiser when using the latest Windows and Mac operating systems, Windows 10 and IOS El Capitan respectively. Thankfully these issues can be quickly fixed by installing certain imaging software.
If you are having this issue, please contact our service team (service@dibaustralia.com.au) and they will walk you through the software fix.
Please see the short video below for an easy walkthrough of setting up and syncing a wireless microphone.
For any further questions, please contact our dedicated service team (service@dibaustralia.com.au)
Some customers have been coming to us with a issue characterised by sound cutting in and out on their wireless microphone systems. Commonly, if you are experiencing such a thing, the problematic system is running in an old unauthorised frequency band and you need to replace the microphone.
For assistance with these steps or any service further questions, please contact our dedicated service team (service@dibaustralia.com.au)
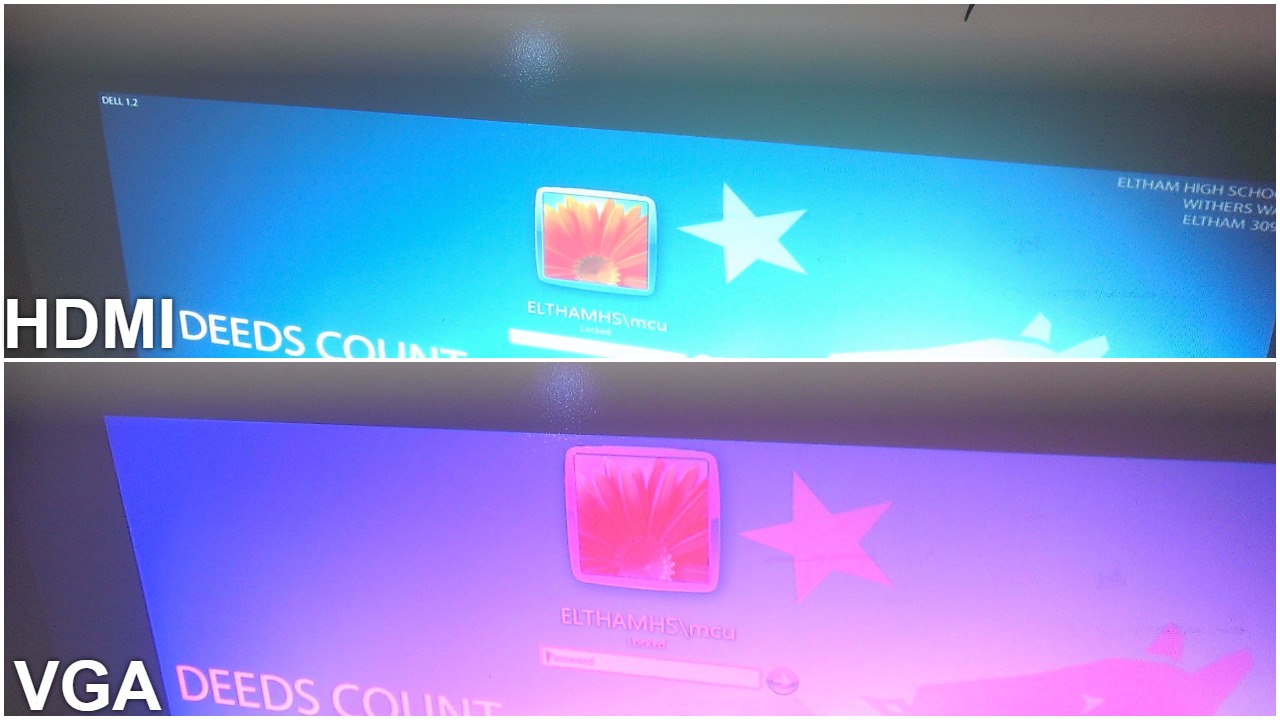
Faulty cables can see a number of symptoms in your projector, monitor, or other display.
If you’re noticing mixed colour or missing colour images when using a VGA connection, your VGA cable may be faulty. On the other hand, a common sign of a faulty HDMI cable is the image cutting in and out.
These issues can be avoided altogether by using higher quality AV cables. At DIB Australia, we supply high grade premium VGA & HDMI cables at a competitive price with 7 years warranty.
For more information about VGA ad HDMI cables, or any service further questions, please contact our dedicated service team (service@dibaustralia.com.au).
Changes to the BCA (Building Code of Australia) ad the DDA (Disability Discrimination act) mean hearing augmentation services need to be provided when an inbuilt amplification system is installed in certain situations.
The ‘Deemed-To-Satisfy’ coverage requirements jumped from 15% to 95% in some floor spaces. Here is what you need to consider to ensure your spaces are compliant and accessible as possible:
Hearing augmentation is a system installed to help those with a hearing impediment. There are a mix of services that can be used as a solution:
Also known as an Induction or Audio loop, provides a wireless signal that can be picked up by a hearing aid when set to the Telecoil setting.
The hearing aid picks up this signal and converts it into sound instead of using the hearing aid’s built in microphone and amplifier. This provides improved speech understanding as the signal has no background noise.

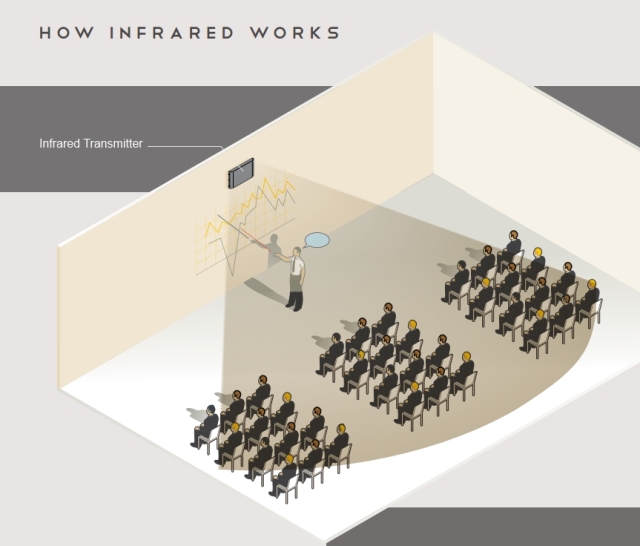
Infrared systems broadcast sound over infrared light that is converted back to audio by infrared receivers.
Similar to the hearing loop, infrared systems only pick up the audio broadcast by the designated microphone and do not pick up as much background noise.
Audio can be broadcast via FM radio over a small area. Hearing aids can then pick this audio up directly by tuning to the corresponding frequency.
Hearing augmentation is required in certain spaces that already have an inbuilt amplification system. Not every space needs one, but these are the main areas:
Induction loops installed in these areas need to cover at least 80% of the floor space. Any space using IR or FM transmitter receiver systems must cover at least 95% of the floor area. There is also a minimum receiver ratio based on how many people can fit into the space:
| No. of occupants in room or space | No. of receivers required |
| Up to 500 | 1 receiver for every 25 persons or part thereof, or 2 receivers whichever is greater |
| More than 500 persons, but not more than 1,000 persons | 20 receivers, plus 1 receiver for every 33 persons or part thereof in excess of 500 persons |
| More than 1,000 persons, but not more than 2,000 persons | 35 receivers, plus 1 receiver for every 50 persons or part thereof in excess of 1,000 persons |
| More than 2,000 persons | 55 receivers, plus 1 receiver for every 100 persons or part thereof in excess of 2,000 persons |
There are additional factors for selecting a hearing augmentation system outside of the BCA that need to be considered. These include sound reverberation, background noise, sound source distances and shapes of rooms.
The BCA does not make 100% coverage a requirement as it is possible for systems to spill over into other rooms and interfere with the augmented hearing systems in other rooms.
Induction loops can spill 10 metres over the area they are designed to cover. Infrared systems only work in direct line of sight, meaning there is less spill over but performance drops in large or oddly shaped spaces. FM transmitters cover large areas, but can be controlled with multiple frequencies.
For more details on how DIB Australia can help install your hearing augmentation system, or assistance with your custom audio visual requirements please phone DIB on (03) 9457-4800 or contact us today.
The Epson PowerLite 1780w is a compact, portable projector that can be carried around with you and taken from meeting to meeting. It’s a tough little unit that can take the bumps and tumbles that come with being carried around in a bag.
Despite its rugged design, its still a projector you want to look after to make sure you get the most out of. The last thing you want is it over heating after being taken out of your bag or for the picture quality to drop.
Here’s your comprehensive guide to maintaining your Epson PowerLite 1780w:
Many parts of the projector are made out of delicate parts. Any harsh impact can cause misalignment inside the projector that can impede the display quality:
The projector will notify you when the filter needs cleaning. However, you should clean the filter whenever you notice a build up of dust inside the projector.

Caution:
Do not use canned air. The gases may leave a flammable residue or push dust and debris into the projector’s optics or other sensitive areas.
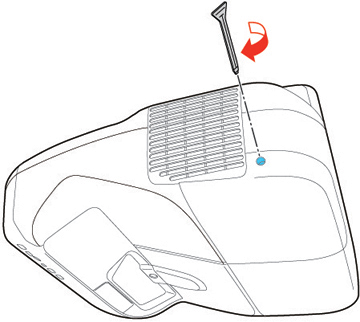
You need to replace the air filter in the following situations:
You can replace the air filter while the projector is mounted to the ceiling, if necessary.


Clean the projector’s lens periodically to remove dust and smudges on the surface.
Caution: Do not use glass cleaner or any harsh materials to clean the lens. Do not subject the lens to any impacts; you may damage it. Do not use canned air, or the gases may leave a residue. Avoid touching the lens with your bare hands to prevent fingerprints on or damage to the lens surface.
Before you replace the lamp, let the projector cool down for at least one hour so the lamp will not be hot.
Warning: Let the lamp fully cool before replacing it to avoid injury.
You can replace the lamp while the projector is mounted to the ceiling, if necessary.


Note: The lamp contains mercury. Please consult your state and local regulations regarding disposal or recycling. Do not put in the trash.


Reset the lamp timer to zero to keep track of the new lamp’s usage.
You must reset the lamp timer after replacing the projector’s lamp. Resetting the timer clears the lamp replacement message and helps keep track of lamp usage correctly.
Note: Do not reset the lamp timer if you have not replaced the lamp to avoid inaccurate lamp usage information.


Before cleaning the projector case, turn off the projector and unplug the power cord.
Replacing a lamp is part of the ongoing maintenance required when using a projector. Many projectors make this easy to do, and can be done with the projector still mounted on whatever surface it is fixed to.
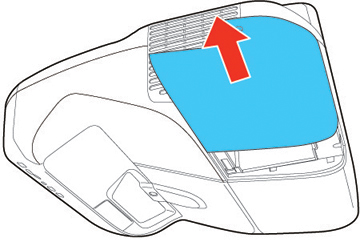
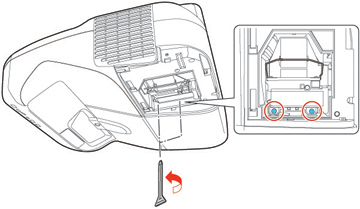
Use this guide to give you a general feel on how to replace a projector lamp if your lamp is nearing the end of its life/
Note: This guide is based on the Epson Brightlink 475wi, but can be used as a general guide on how to replace a projector lamp. If you have any complications replacing a projector lamp, contact the manufacturer or the installer.
Before you replace the lamp, let the projector cool down for at least one hour so the lamp will not be hot.
Warning: Let the lamp fully cool before replacing it to avoid injury.
You can replace the lamp while the projector is mounted on the wall or ceiling.
Warning: If the lamp is broken, glass fragments may be loose inside the lamp chamber. Be careful removing any broken glass to avoid injury. If the projector is mounted on the wall or ceiling, stand to the side in case the lamp is broken.


Note: The lamp(s) in this product contain mercury. Please consult your state and local regulations regarding disposal or recycling. Do not put in the trash.
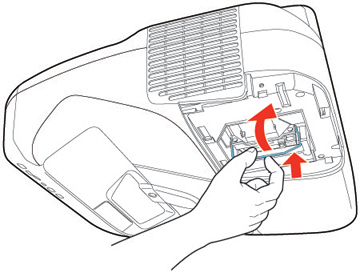
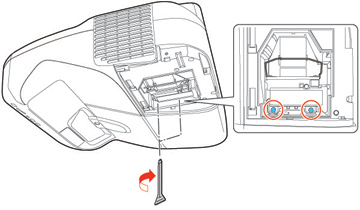
Note: Be sure the lamp cover is securely installed or the lamp will not come on.
If you have any questions related to projectors or need assistance with your custom audio visual requirements, contact a DIB Audio Visual Solutions Consultant today Phone (03) 9457-4800 or contact us
Over time, your projector will gather dust in its air filter and need to be cleaned. Projectors have notifications telling you when an air filter needs to e cleaned, but you should make cleaning the air filter part of your regular process to maintain a projector.
Here are the steps to take when your projector says it’s time to clean the air filter, or of you want to clean the air filter yourself as part of ongoing maintenance.
Note: This guide is based on the Epson Brightlink 475wi, but can be used as a general guide on how to replace a projector air filter. If you have any complications replacing an air filter, contact the manufacturer or the installer.

Air filters will only last so long before they need to be replaced. Even with regular cleaning, it is impossible to remove all the dust from an air filter, and dust will build up over time.
You should replace an air filter when it is damaged, or when the projector says you need to clean the air filter, even when you’e just cleaned it. You can replace the air filter while the projector is mounted on the wall or ceiling.


If you have any questions related to projectors or need assistance with your custom audio visual requirements, contact a DIB Audio Visual Solutions Consultant today Phone (03) 9457-4800 or contact us


EPSON iProjection for iOS Setup
Note:
 to eject your iOS device from iTunes.

Advanced
The Internet connection appears to be offline
Web Page
Not sure which light source is right for you? Compare the benefits and considerations associated with lamp and laser projectors to inform your purchase decision.
Almost every teacher has had to deal with the problems that come with your standard bulb projectors. They blow in the middle of a lesson, require maintenance over time, and can lose quality as the bulb ages.
There’s a new type of projector in town, the laser projector. This new type of projector uses an LED-based laser light to project its images. But are laser projectors the new be all to end all of projectors?
Here’s a comparison guide to help you decide which projector you should go with:
Lamp projectors are the traditional projectors you know (and love?). Lamp projectors use a giant light bulb to project their images on the screen. The lamp takes time to warm up, loses image brightness after 10 hours, and requires fans inside the projector to deal with all the heat generated.
However, lamp projectors are cheaper and easier to setup in the initial stages. Since lamp projector technology has been around for a number of years, they have become relatively cheap and easy to maintain.
Laser projectors use LED lights to project their image. LED’s are brighter, have a sharper image, require no heating up, and use less electricity. Running at a lower temperature means laser projectors don’t require as much cooling inside the projector unit.
Laser projectors also have greater contrast than lamp projectors. Blacks on laser projectors are much stronger as the LEDs just don’t fire on black sections of the screen. Lamp projectors need to project no matter what, meaning blacks are never as dark as they could be.
Laser projectors also last longer than lamps. The unit in most laser projectors can last for 20,000 hours, meaning they could be run for 8 hours a day for 12.5 years without maintenance.
Laser projectors do cost more. The laser projection units cost more as well due to the newer technology. However, when you balance the figures, the electricity and maintenance savings of a laser projector over its lifetime compared to a lamp projector makes the benefits obvious.
The only drawback to laser projectors is price, which is dropping all the time. There are too many benefits to laser projectors to pass them up if you can afford it. If you have the budget for laser projectors, you should consider them in your next AV upgrade.
If you have any questions related to projectors or need assistance with your custom audio visual requirements, contact a DIB Audio Visual Solutions Consultant today Phone (03) 9457-4800 or contact us
Try these solutions when you cannot monitor or control the projectors.
If you do not receive an email alerting you to problems with a projector over the network, try the following solutions:
If the message broadcasting feature does not work, try the following solutions:
If you have any questions related to projectors or need assistance with your custom audio visual requirements, contact a DIB Audio Visual Solutions Consultant today Phone (03) 9457-4800 or contact us